How to Add a Frame to an Uploaded Picture
How to Add a Border to a Photo on PC?
Learn to do that with PhotoWorks or explore other helpful ways!
Full support for Windows eleven, 10, viii, 7
How to Add a Border to a Moving-picture show on PC - Top v Ways in 2022
Want to make a trendy Polaroid-similar photo or a cute framed pic simply have no clue how? So you are in the right identify. We are familiar with how challenging it might be to find the perfect program to use, specially for a newbie. So we will not only teach you lot how to add a edge to a photo merely will also aid you cull the most suitable tool for you lot personally.
In this guide, you'll learn the v all-time ways to decorate your moving-picture show with a frame that volition be useful in 2022! Take a glance:
- Way ane. Add a edge in a click with PhotoWorks
- Way 2. Create a masterpiece with Photoshop
- Manner 3. Utilise MS Word to decorate your pic
- Way iv. Opt for an online border editor
- Fashion five. Do a quick job with MS Paint
Fashion 1: Add a Border to a Photo in PhotoWorks
Searching for PC software packed with features but also piece of cake enough for a non-professional to use? And so PhotoWorks is exactly what you are looking for. This automatic photograph editing software has a clear minimalistic interface and is equipped with both basic and advanced photo editing tools. Its smart AI makes PhotoWorks super convenient and effective.
Have a look at the step-by-step tutorial on how to add together a frame to your moving picture.
Step 1. Upload Your Photograph
Brainstorm with choosing the photo you want to decorate. Upload it to the first window of the program. Have multiple photos to add together a edge to? No problem! Click the folder push and you will run across all your photos and exist able to switch between them.
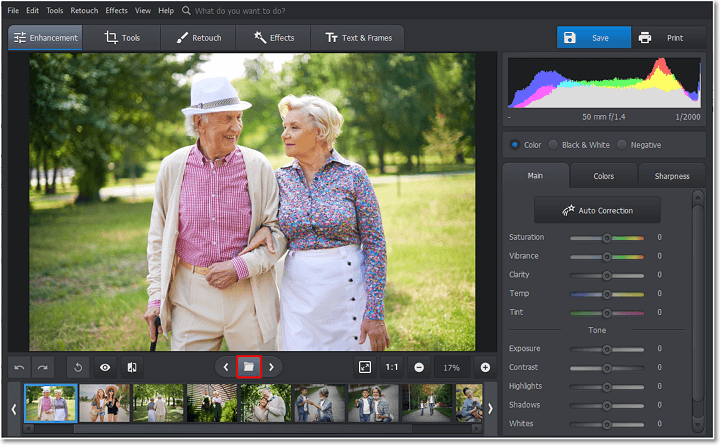
Choose one pic or switch between several ones
Footstep 2. Set a Border Around the Image
Switch to the Text & Frames tab and click Frames. Run through the set of premade borders of different styles to notice the one that speaks to you the most. And then click it to effort it on your motion picture. Change its colour to the one y'all like. Apply the top slider to adjust the size of the frame.
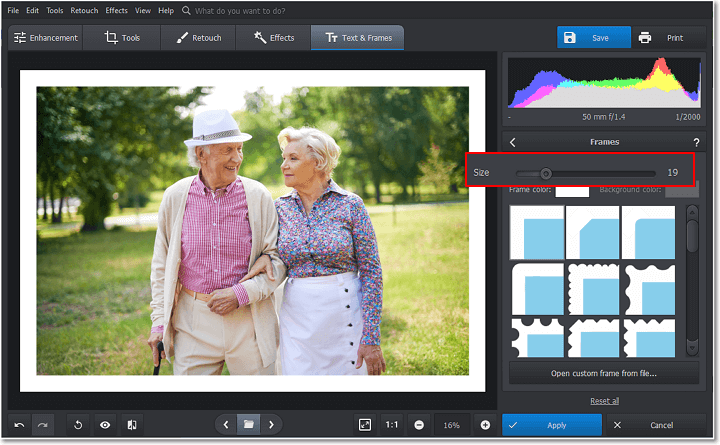
Choose from a collection of beautiful frames
Pace 3. Save Your Picture
As the concluding step, employ all the changes. If there is nothing else you want to change in your pic, click the Save or Print button in the top toolbar. Now, your photograph is fix for posting on socials or mailing to a friend.
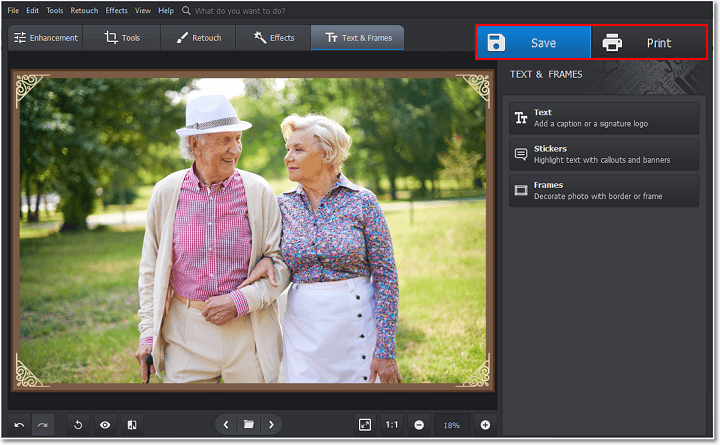
Save your picture to post it online or print it correct abroad
If y'all are a visual learner, here is a short video tutorial to aid you digest the new information:

Polish and audio, isn't it? Want to embellish your pics simply as easily? Download PhotoWorks for free right at present.
In that location are many things you tin can do with PhotoWorks, yet they do not require much try. In a click of a mouse, you can retouch the model'south portrait, mistiness the background of a picture, and remove unnecessary objects or people. Besides, you take an option to add captions to your images or identify watermarks, then that no one tin use your masterpieces without your permission.
Way 2: Use Photoshop to Put a Border Effectually Your Image
Already have a lot of experience in photo editing? Then Photoshop, the powerful all-in-ane tool, is the program to employ. With its help, yous volition have the artistic freedom to create your own frames limited only by your imagination. However, if you lot have never used Photoshop before, information technology will take time and endeavor for you to get used to its avant-garde features.
Either style, let'south discover out how to add together a border to a picture, using this program, shall we?
Step 1. Import Your Movie & Add a Layer
Open your photo in Photoshop: File > Open. Then, create some other layer for your border by going to the Layers tab > New > Layer from Background. And then click OK in the emerging dialog box. Once you have the needed layer, you tin set the size of the frame.
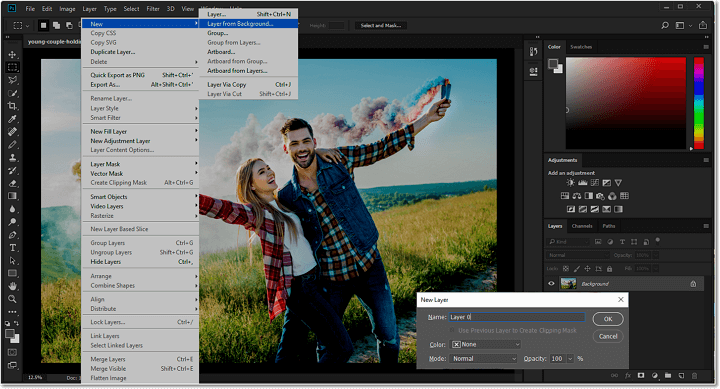
Create a new layer for your edge
Step ii. Add a Edge to Your Photo
Switch to the Epitome tab > Canvas Size. Type in the frame size in pixels. Make certain the Relative box is checked. Each number is divide between edges. And so if you enter 300 pixels in each field, you will have a edge of 150 pixels broad. Set the Anchor to the center and click OK to apply the changes.
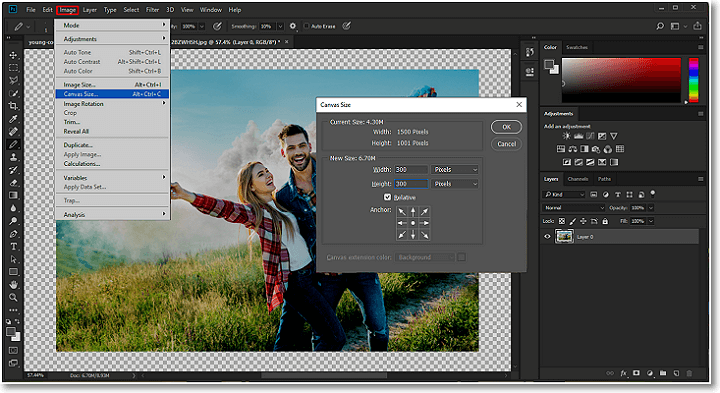
Fix the size of your border layer
Step 3. Fill in the Edge
Click the Create a New Fill or Adjustment Layer button at the lesser of the Layers panel. Go to Solid Color and prepare a white border, blackness border, or of whichever you like more. Drag the new layer to the bottom of the Layers panel.
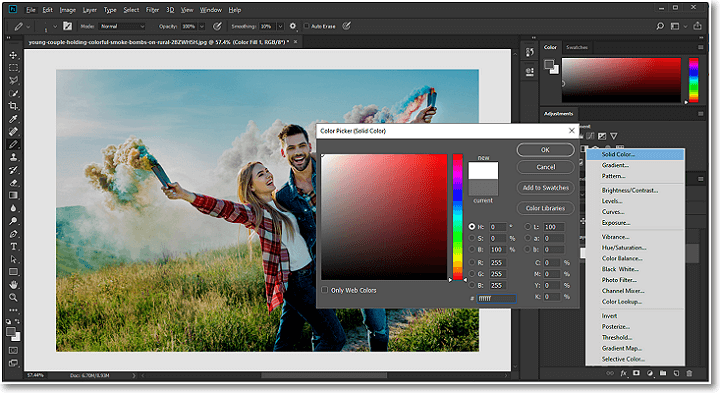
Brand a minimalistic white frame
Step 4. Salvage Your Prototype
In one case you cease editing your pic, go to the File tab and click Relieve As. Choose the format that you want your picture to be saved in. We recommend PNG for better quality.
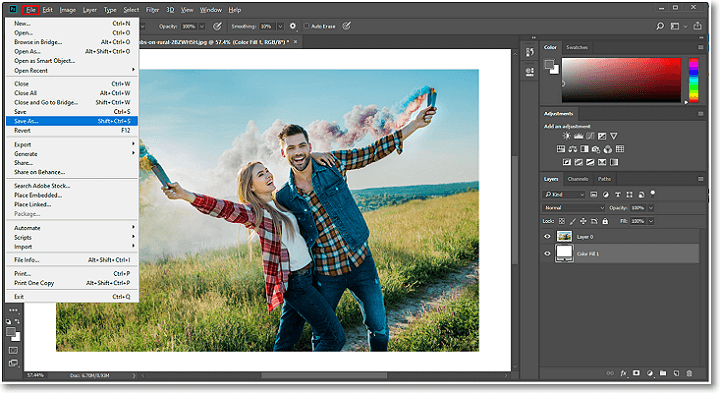
Save your framed picture as PNG
If yous have farther questions regarding this way of adding a frame to an paradigm, visit the official Adobe Photoshop website.
As yous can meet, adding a border to a photo in Photoshop is pretty complicated and requires many manipulations. Thus, we would advise inexperienced photo enthusiasts to avoid this battle and go with a more intuitive tool. Only for you, photoshopping geniuses out there, there is no better solution than this 1. However, heed that Photoshop requires a monthly subscription.
Way 3: Add a Border to a Picture show with Microsoft Discussion
The biggest advantage of Microsoft Word is that the majority of Windows users have it on their PCs, and then there is no need to clog upwards memory by installing additional programs. But carry in mind that this software is rather limited in its functionality when it comes to working with pictures because that is not its essential purpose. And so the collection of frames is obviously not too various. However, if your aspirations are non as well big, Microsoft Word might be just fine for the task.
Step 1. Upload Your Photo
Go to the Insert tab and click the Picture show icon. Then choose the picture you want to upload into the Word document. Or instead, copy and paste the photo.
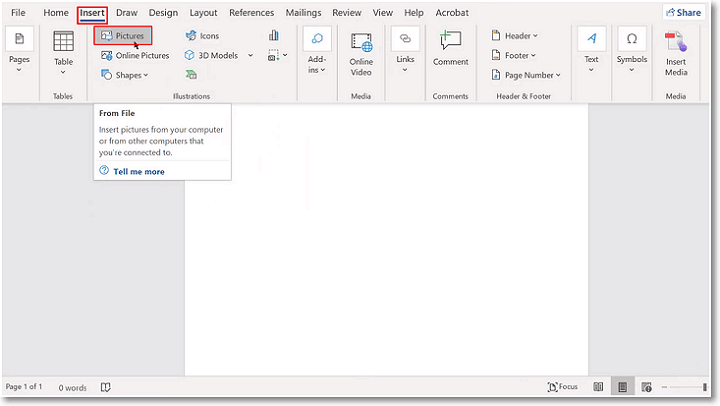
Insert your pic into the document
Step 2. Customize the Picture
Once you accept uploaded the image and properly resized information technology, go to the Flick Format tab and choose a frame from the dropdown card in the top left. A quicker fashion is correct-clicking the picture and going to Styles. You can too create your own frame and select its color on the Film Format tab if you go to the Motion-picture show Border colour palette. At the bottom of the palette, in the Weight list, choose the border width, or get to the Dashes list to brand a dotted-line style border.
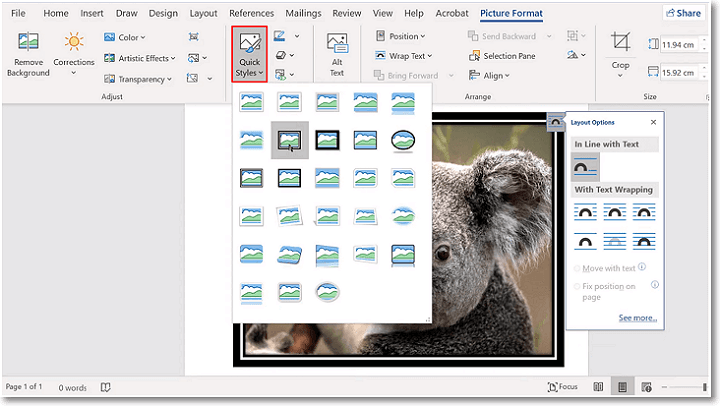
Select a premade frame or create your own
Step 3. Salvage Your Framed Prototype
Go to File > Save Every bit or Print instead, and in that location y'all go. Yous can cut out your framed picture from the printed certificate or convert the saved one to PDF or JPEG to crop information technology.

Save your picture and ready it for posting
Now you know how to add a border to a photo in the new versions of Microsoft Give-and-take. For more than detail or a stride-past-footstep guide in older versions, visit the official Microsoft tutorial.
Adding a edge to an image in Microsoft Word is equally piece of cake as ABC. Merely after saving or printing the movie, there is even so a ready of additional things left for you to do before y'all get the concluding result: cutting, cropping, converting, etc. So to some, this way of adding a frame to a photograph might seem a bit time-consuming.
Are you thinking about what else you can exercise to make your pics look cool? Add together stickers to your photos! PhotoWorks offers yous plenty of sticker labels to cull from. You tin can too customize them by calculation some creative text or a quote.
Way 4: Put a Border Around a Picture Online
Don't similar offline photo editing programs or don't take enough retentivity to download them? No problem - utilise an online frame editor called Fotor. This tool has an easy-to-navigate interface and offers frames for all tastes. So with Fotor, you will ever be able to create a perfect design in a couple of minutes with no previous feel. But in instance you lot have a poor Net connection at habitation, it is not a worthy purchase. The long loading volition take abroad a lot of actress time.
If your Internet connection is strong enough, here's an easy tutorial on how to decorate your photo with a frame in Fotor.
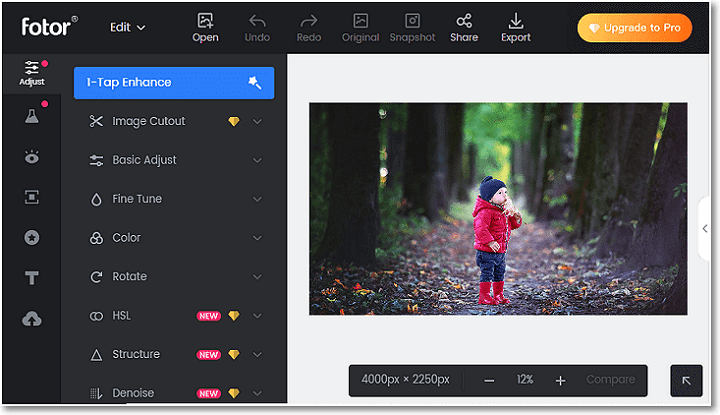
Step i. Import Your Photo
Once yous open the tool, it will greet you with a handy introduction to its functions. Fotor is pretty intuitive, so at that place is no need for you to read the whole intro. Just skip it, click Import, and open the photo yous want to edit.
Choose a photo and upload information technology into the window
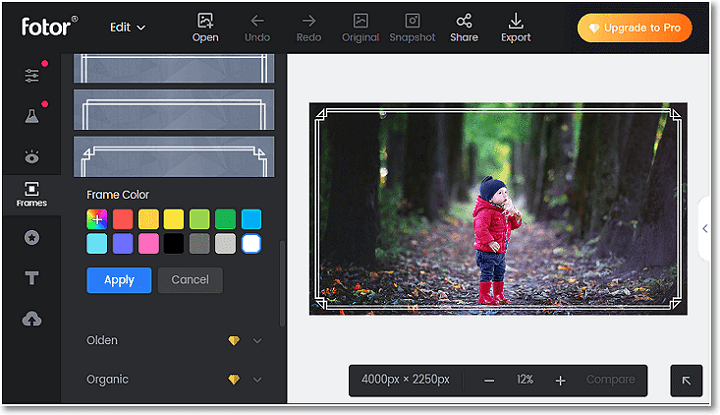
Footstep two. Add together a Border to Your Movie
Go to the Frames tab on the left sidebar and choose from the different categories of frames, from cute and funky to themed and fashionable. You also have an option to add together a shadow of any color instead of the frame.
Utilize the coolest frame you can observe
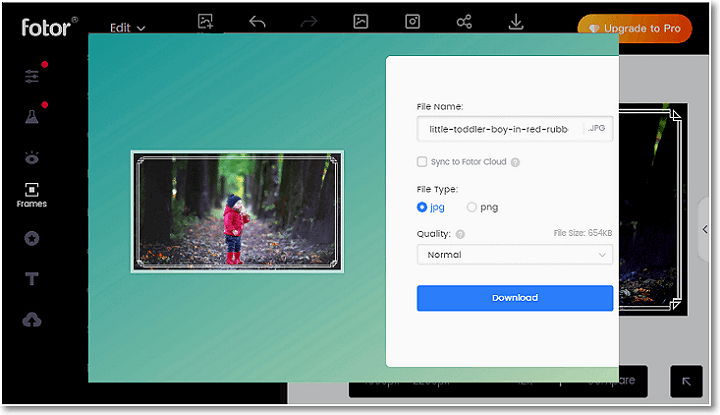
Footstep three. Save the Film to Your PC
In one case you are through with editing, click Consign in the top bar. The program will offering you to relieve the image equally JPEG or PNG. Choose whichever is best for you.
Download the work of art y'all have put together
If your choice vicious on Fotor, access the tool via the official website.
Fotor is an splendid tool for online editing. Nonetheless, the biggest concern that yous might have about it is that there is no way to work with it unless you create an account and log in. Additionally, the collection of frames in the free version is express. And if you want the full version, you have to buy a monthly subscription.
Not so happy about the background of your original image? No worries, y'all can prepare that! Add a unlike background to your photograph with PhotoWorks. You can either choose a background from the collection within the program or use a photograph from your camera gyre or from the web.
Way five: Employ Microsoft Paint to Add together a Border to an Paradigm
If online tools are not your thing and you prefer something less fancy merely not as primitive as Microsoft Give-and-take, go with the classic Microsoft Paint. The program is easy even for children and volition let you to add a colorful frame to any photo super quickly. Besides, if you accept a Windows calculator or laptop, you have this motion picture editor built in. Nevertheless, if you are a Mac user, you will have to find an alternative.
For the Windows squad out in that location, here are the steps y'all have to follow to add together a border to your picture in Pigment.
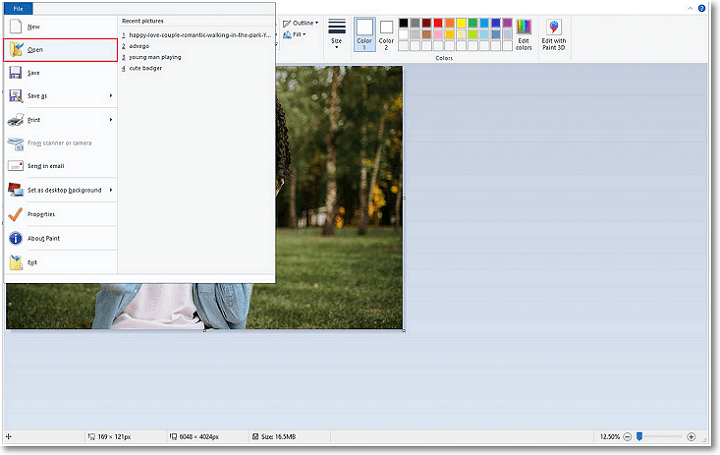
Stride 1. Upload Your Picture
Click File on the top left bar > Open up, and choose a picture. Zoom in or out with the aid of the slider in the lesser right toolbar.
Employ the zoom slider for easier editing
Footstep ii. Add Your Frame
Find the Shapes carte in the top toolbar and click the rectangular shape. Then, adjust its size and wrap it around your picture. If yous want to change the texture of the frame, go to the Outline dropdown menu. Cull the color in the color palette or in the color picker. Change the thickness of the deadline in the Size dropdown. Brand a cute frame by combining multiple figures.
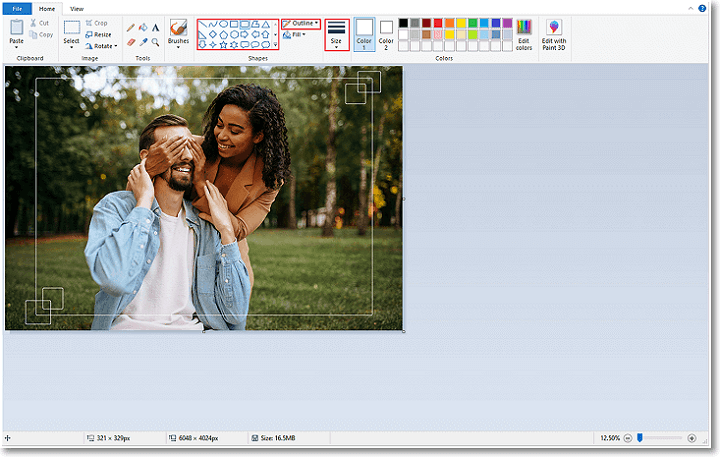
Use multiple shapes to draw your frame
Step 3. Save Your Work
Once you lot are fully satisfied with the frame y'all take created, go to File carte du jour > Save Equally, and cull the format you want your framed flick to be saved in.

Save your minimalistic design
Microsoft Paint is a program that feels familiar to nigh people, and that is why it is and then piece of cake and comfy to work with. Unfortunately, Microsoft Pigment is unavailable for Macintosh users. Besides, no matter how easy Paint is, its capabilities are pretty modest in comparison to modern editing programs. However, if you are going for a minimalistic watercolor frame, Paint is but correct for that.
Determination
By now, we have gone over v different ways of how to put a border around a picture. Among them, you are sure to find the right one regardless of your skill level. Don't have a Windows PC? Online tools for setting borders on pics are always at paw. Are you a pro in paradigm editing? Brand a fantastic frame in Photoshop. A newbie? Go with easy Microsoft tools. And people of diverse skill levels and experiences will enjoy PhotoWorks, the multifunctional software for PC. The plan is equipped with professional person tools that are super like shooting fish in a barrel to employ. And even amateur works fabricated with PhotoWorks tin compete with professional creations.
Source: https://photo-works.net/how-to-add-a-border-to-a-photo.php
0 Response to "How to Add a Frame to an Uploaded Picture"
Publicar un comentario